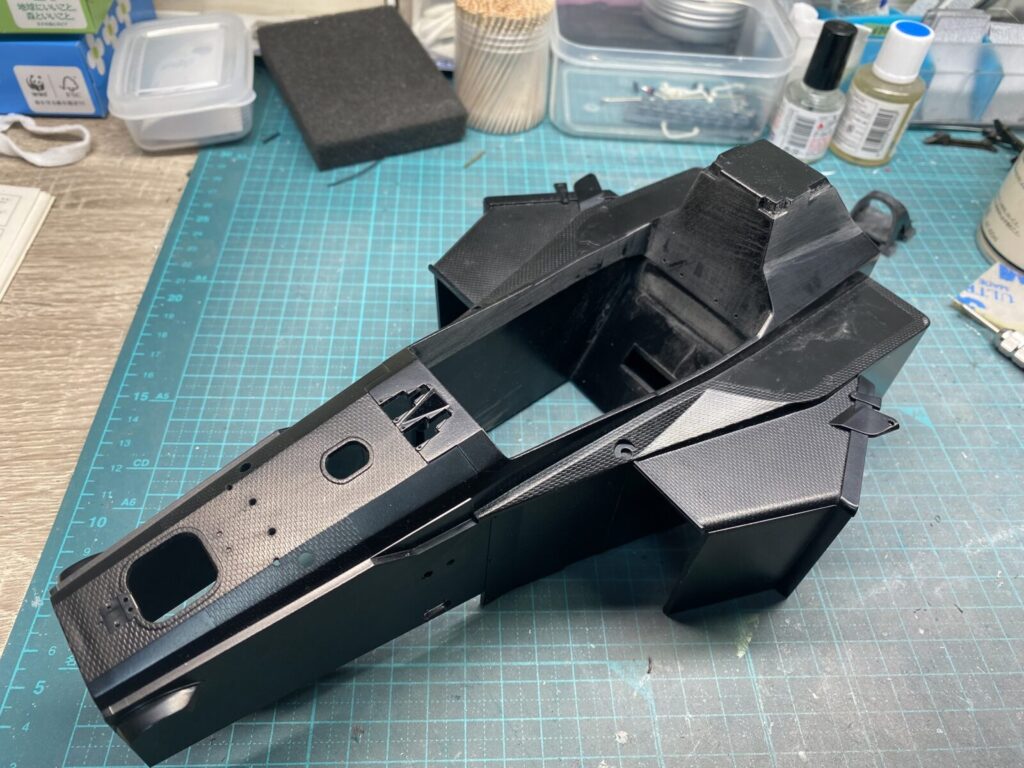
モノコックの仮組みが完了したので、一旦すべてのパーツを分解します。
仮組みで確認した修正箇所を反映しながら、各パーツの下地処理やディテールアップ、塗装を進めるため、本格的な製作に入っていきます。
With the test fitting of the monocoque complete, the entire assembly is disassembled once again.
Now that all necessary adjustments have been identified, each part can be prepared, detailed, and painted before the final assembly begins.
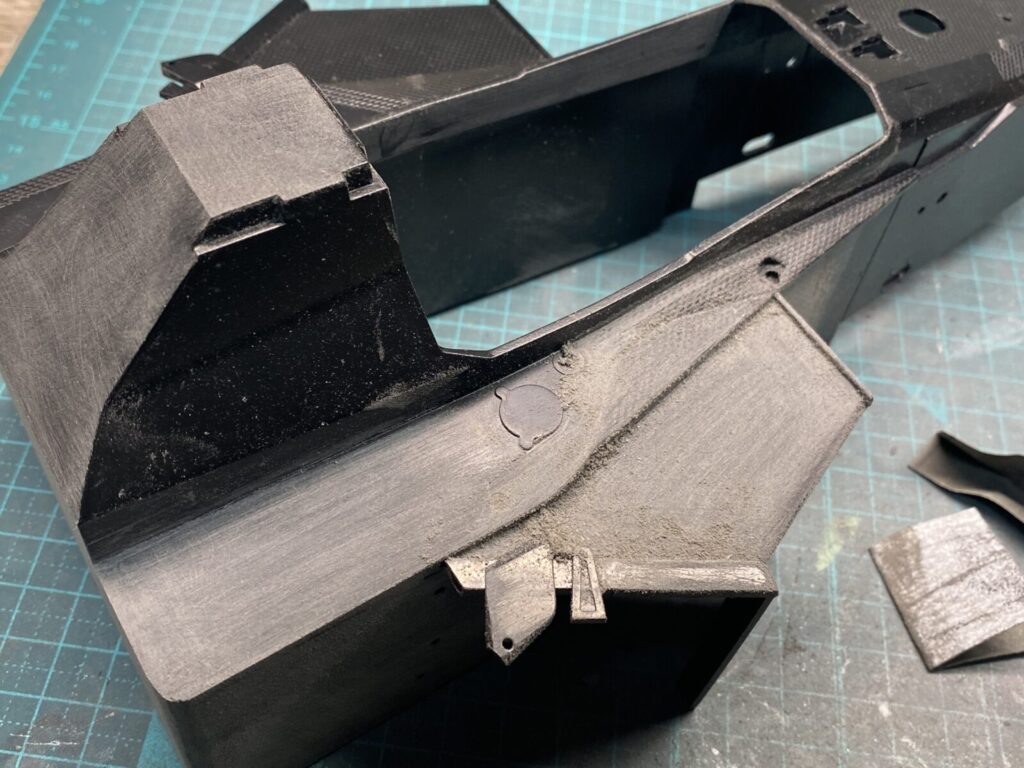
モノコック全体には、カーボンを表現したものと思われるモールドが全面に施されています。
今回はカーボンデカールで仕上げる予定のため、このモールドはすべて削り落とし、表面を滑らかに整えてからデカールを貼り込んでいきます。
The entire monocoque features a molded surface texture, which appears to represent the carbon fiber finish.
Since the monocoque will be covered with carbon fiber decals, all of this molded texture will be carefully removed to create a smooth surface before applying the decals.
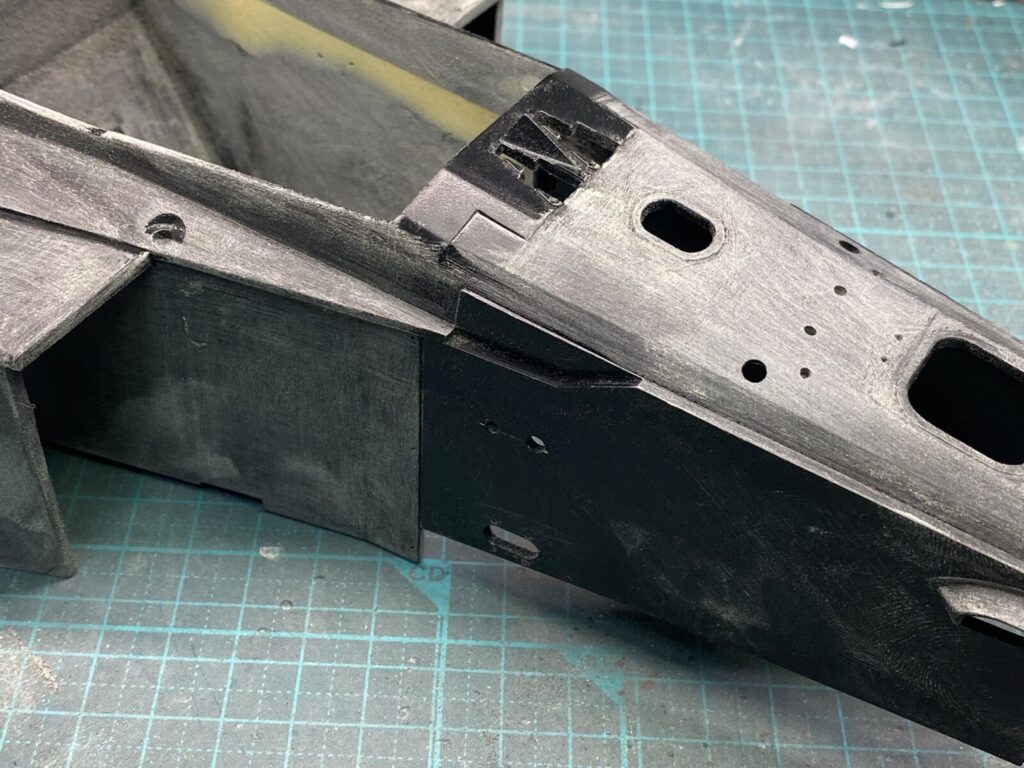
コックピット内部には目立つ段差があるため、製作工程を変更し、この段階でパーツを一体化しました。
接合後はパテを使って段差を丁寧に埋め、表面を滑らかに仕上げておきます。
A noticeable step is present inside the cockpit, so the assembly sequence was revised and the parts were permanently joined at this stage.
After bonding the parts together, the joint was filled with putty and carefully smoothed to create a seamless finish.
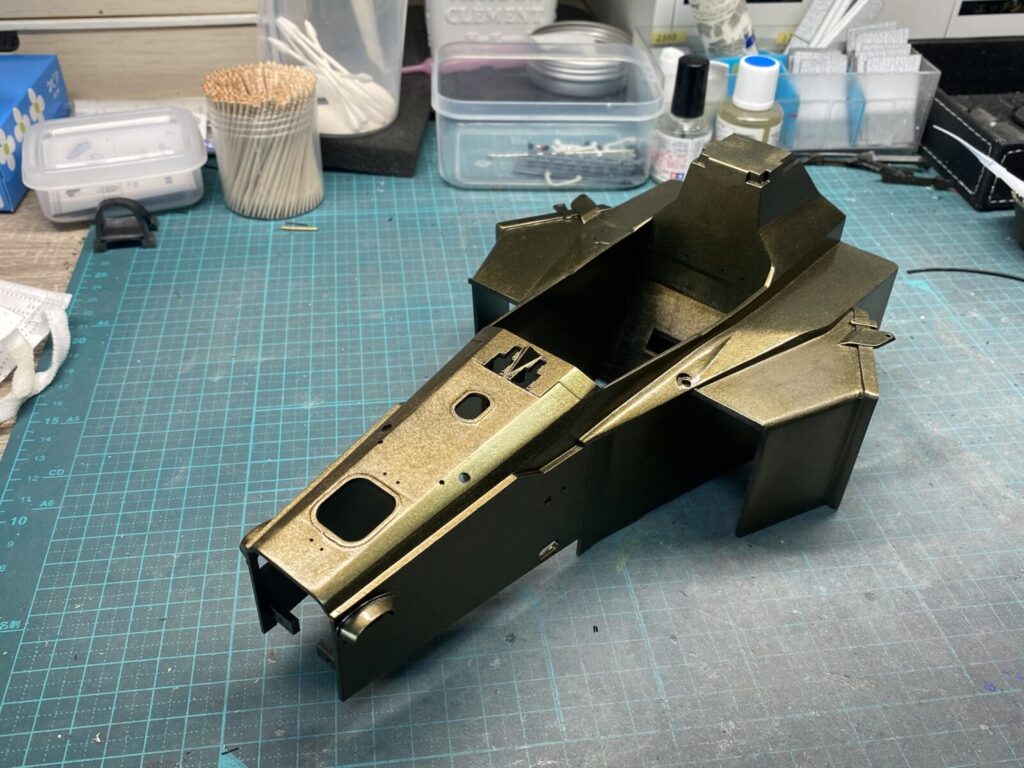
プライマーを吹いた後、ブラックサーフェーサーで下地を整えます。
その後、カーボンデカールの色味に深みを持たせるため、下地としてカーボンゴールドを全体に吹き付けました。
After applying a coat of primer, the surface was prepared with black surfacer.
A coat of Carbon Gold was then sprayed over the entire monocoque as a base color to enhance the depth and tone of the carbon fiber decals.
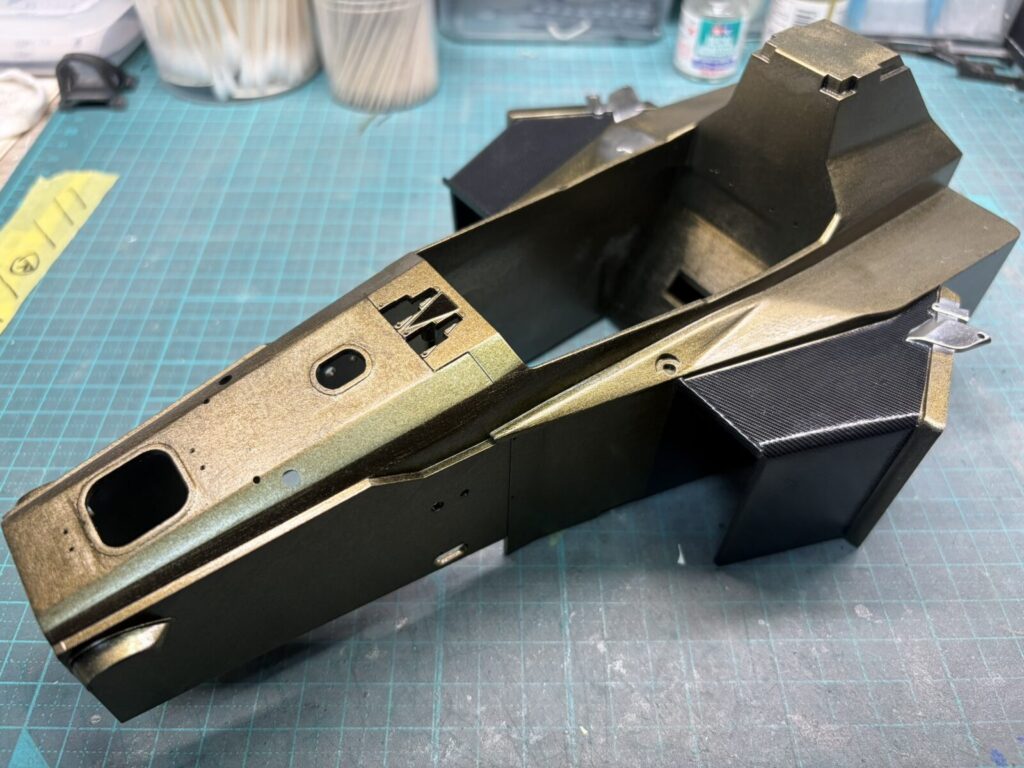
モノコックには、部位ごとに織り目の異なる数種類のカーボンデカールを使用します。
まずは貼り込みやすいダクト部分から作業を進め、全体の仕上がりを確認しながら貼り分けていきます。
Several different types of carbon fiber decals are used on the monocoque, each selected to match the weave pattern of the corresponding area.
The application begins with the duct sections, which are easier to work with, before moving on to the rest of the monocoque while checking the overall appearance and consistency.
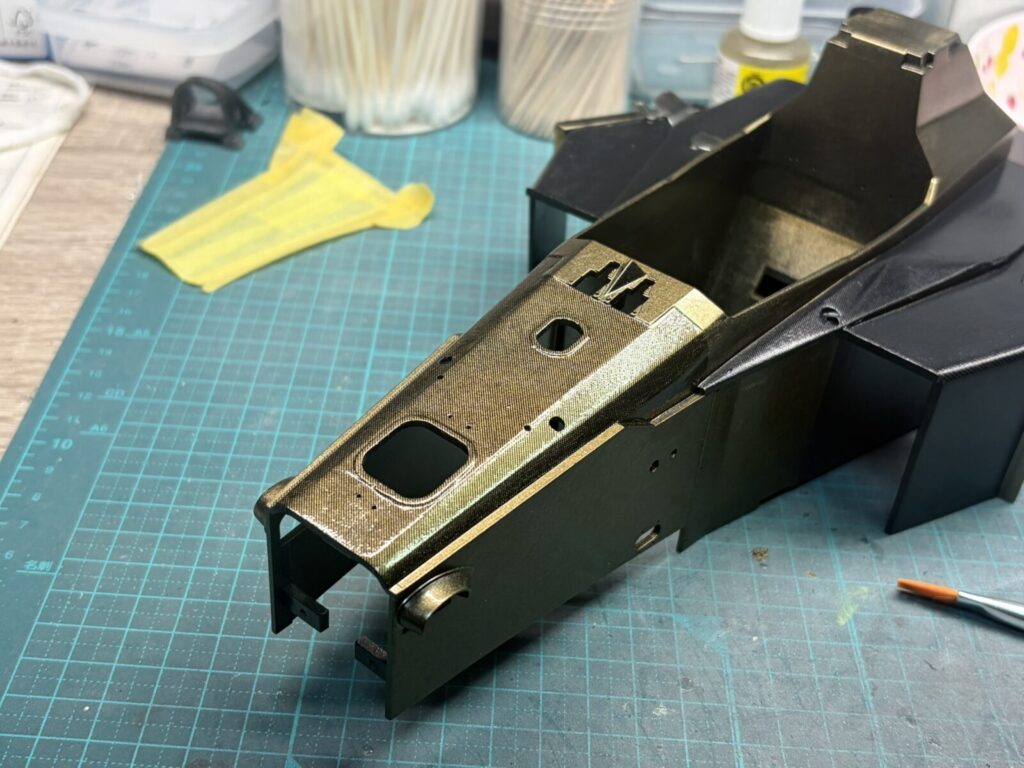
次に、偏光タイプのカーボンデカールを貼っていきます。
実車と同じように、光の当たり方によってゴールドにもブラックにも見える質感を再現できるよう仕上げていきます。
Next, the iridescent carbon fiber decals are applied.
The goal is to replicate the appearance of the real car, where the carbon surface shifts between gold and black depending on the angle of the light, creating a realistic and dynamic finish.
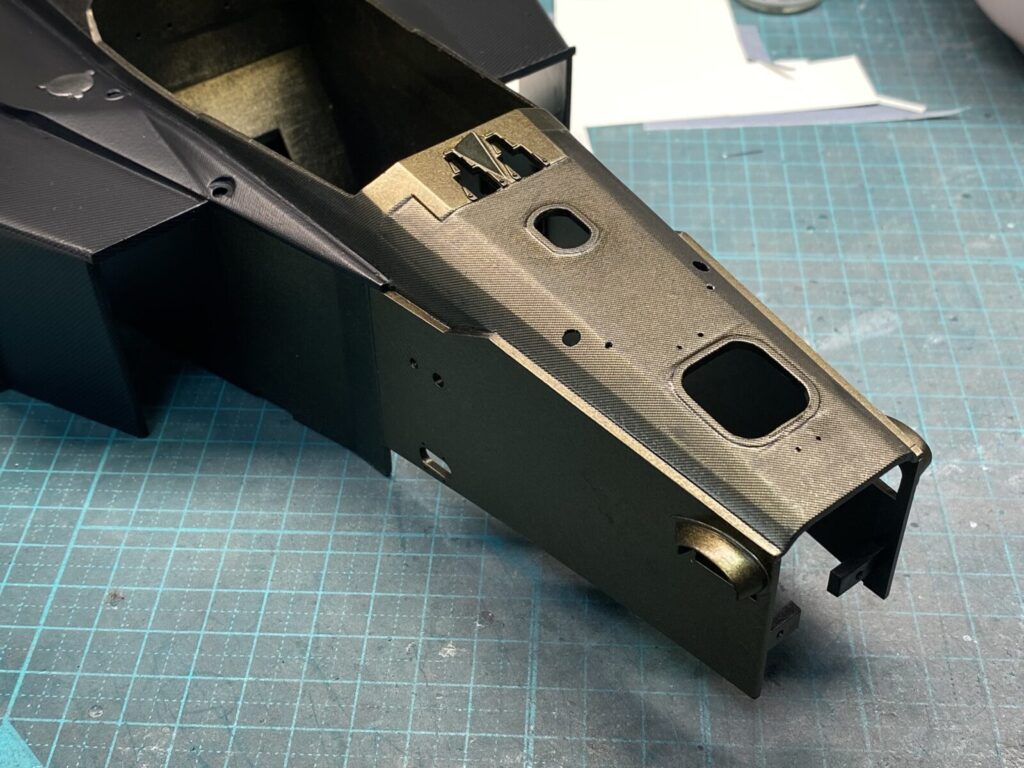
部分的に偏光タイプのカーボンデカールを重ね貼りし、実車に近い色味になるよう微調整を行います。
貼り終えた後は、カーボンデカールが完全に密着するまで数日間しっかりと乾燥させます。
Additional layers of the iridescent carbon fiber decals are applied selectively to fine-tune the color and achieve a closer match to the appearance of the real car.
Once all the decals have been applied, the monocoque is left to dry thoroughly for several days to ensure the carbon fiber decals fully adhere before proceeding to the next stage.
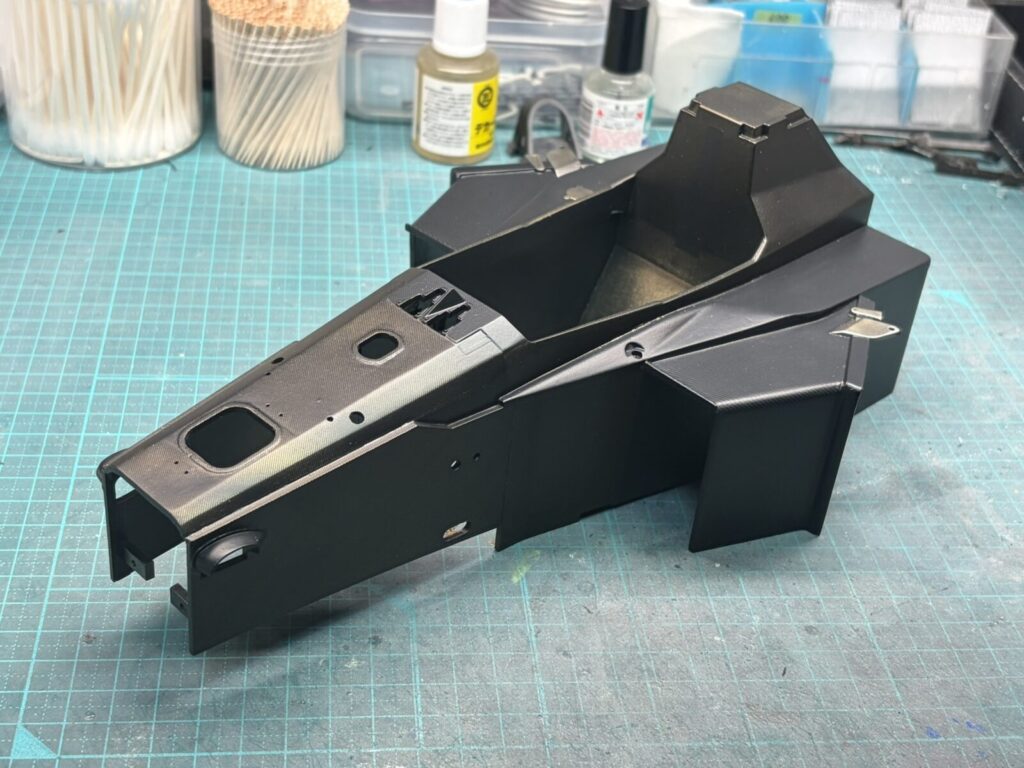
カーボンデカールが十分に乾燥したら、デカール表面を保護するためにウレタンクリアーを吹き付け、さらに十分な乾燥時間を設けます。
その後、セミグロスクリアーで全体の艶を整え、実車に近い落ち着いた質感に仕上げます。
Once the carbon fiber decals have fully cured, a coat of two-part urethane clear is applied to protect the decal surface, followed by another thorough curing period.
Afterward, the entire monocoque is finished with a semi-gloss clear coat to achieve the subtle sheen and realistic appearance of the full-size car.